Over the two and a half years that I’ve been writing SuiteTalk, I’ve hit about every problem imaginable connecting SuiteTalk to my sandbox. I’m afraid if I started listing them, it would only frustrate me further. So I’m just going to give myself a comprehensive cheat sheet. And, I’m inviting you to cheat off my cheat sheet. Why not?
I didn’t think that I needed to recreate my integration and access token each time I refreshed my sandbox, but as of publishing this post, I did. Here is a complete checklist so that next time I can save lots of time.
1. Create a new Integration: Setup >> Integrations >> Manage Integrations >> New

2. When you click Save, record the following. You’ll only see it once.

3. Start a notepad file and paste in the details. You’ll need to save this somewhere where you can find it again.

4. Create an Access Token: Setup >> Users/Roles >> Access Tokens >> New

5. When you hit Save, record the details. You’ll only see it once.

6. Put it in the same notepad file you created with the integration.

7. Save these in your code along with your account id. In this case, I’m connecting to the sandbox, so I add “_SB1” to my sandbox account.

These constants get used when creating your token. I’ve written other posts on this. See those for a copy of this code.

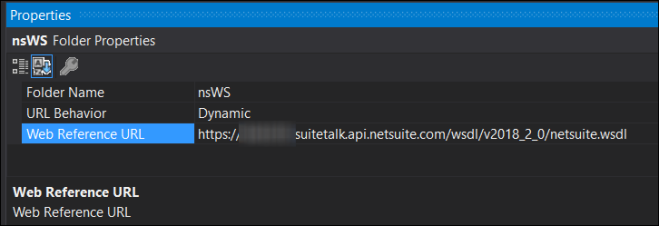
8. Edit your web Reference URL to include your account number.

Hit F4 to view properties.
9. When you run your application, if you are using the same DataCenterAwareNetSuiteService class that I use, then you’ll see the following. It is a combination of the URL you bind your Visual Studio project to and the data center agnostic URL.

To understand where this URL comes from, see line 11 above.
FYI… I’m deleting this integration and access token. You’ll need to get your own. Hope this saves us both some time in the future. I’ve wasted enough time on this for both of us!
